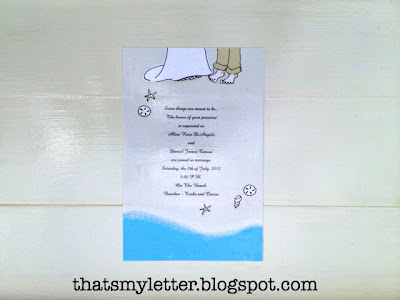
Build: wedding invitation serving tray
I made this wooden serving tray and sealed the wedding invitation on the surface:
It's a generous size with cut out handles for easy carrying:
A keepsake for their invitation, preserved under layers of gloss varnish and acrylic:
And makes for a great bridal shower gift.
The edges are distressed slightly in keeping with the beachy nature of the invitation:
Here's how I made the serving tray:
1. Cut wood to size:
3 - 1x5 @ 18"
2 - 1x3 @ 18"
2 - 1x3 @15"
Make pocket holes in 1x5 pieces to attach to each other and for attaching the sides:
2. Secure all pieces.
Add 1/4" plywood to underside with finish nails and glue:
3. Mark short sides for cut out handles:
4. Begin cut out handles with circular bit:
5. Then cut remaining part with jig saw:
6. Prime.
Paint two coats off white.
7. Attach invitation using mod podge on both back and front:
8. Apply Americana DuraClear gloss varnish to tray surface with foam brush.
Thin coats are best.
I applied at least 5 coats.
9. Spray entire tray with clear gloss acrylic, again multiple coats to achieve a hard glossy seal.
Ready for serving:
I'm linking up to:
Whatcha Got Weekend @ Lolly Jane
SAS @ Funky Junk
Sister Sunday @ Sisters of the Wild West
Just Something I Whipped Up @ The Girl Creative
DIY Fall Festival @ The DIY Showoff
Made by You Monday @ Skip to My Lou
Nifty Thrifty @ Coastal Charm
Tuesday Treasures @ My Uncommon Slice of Suburbia
Tutorials & Tips Tuesday @ Home Stories A to Z
Good Life @ A Beach Cottage
Transformation Thursday @ The Shabby Creek Cottage
Strut Your Stuff @ Somewhat Simple
Share Awesomeness Thur @ The 36th Avenue
Flaunt it Friday @ Chic on a Shoestring
Frugal Friday @ The Shabby Nest
SAS @ Just a Girl
Feathered Nest @ French Country Cottage
Remodelaholics Anonymous @ Remodelaholic
inspiration board @ Carolyns Homework


No comments:
Post a Comment