Tapered wood bins for mudroom storage.
I built custom wood bins for mudroom cubbies for a Westport customer.
Here's the before pic of the space, you'll have to imagine the bins placed in each 'here' section:
Each initial stands for the first letter of the family member:
And then I built three large, deep bins too:
Another before pic shows the opposite side of their mudroom, imagine these tall bins in the 'here' spots:
These deep bins will provide beautiful, concealed storage:
And easy to pull out with the rope handle:
The inspiration for this project came straight from a previous post here:
I built these monogrammed tapered wood bins with handles:
Here's how I made the bins:
1. After receiving an email request from the customer I drew up a few options and we settled on these shapes:
2. Using 1/2" plywood cut the pieces:
3. Cut out the handle opening for the smaller bins using a jigsaw:
4. Assemble the boxes using #6 - 1 1/2"screws and glue.
Nail 1/4" plywood to bottoms.
Putty up and sand smooth.
Pre-drill holes for rope handles now.
5. Finish:
- One coat Zinsser primer
- Two coats BM wedgewood blue
- Sand edges to distress
- Stain Minwax Early American
Add decorative items now.
6. For the monogrammed bins find the middle:
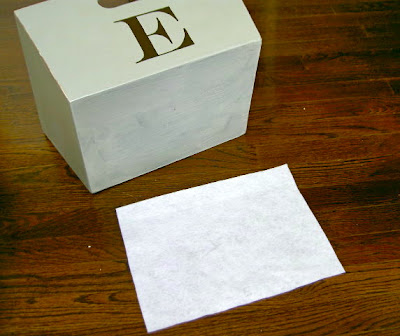
7. Print out the letter to size and fold to find the middle.
Match up midpoints and secure paper to bin.
Trace around letter using ballpoint pen to leave indent in wood.
8. Paint on and inside the indented lines:
(I used Behr French Roast.)
9. For the tall deep bins mark the stripe with a pencil using a ruler.
(A quilting ruler works best because it's clear.)
10. Paint on and inside pencil lines:
11. Seal inside and out using Minwax poly satin finish.
12. Add felt to bottom to protect cubby surface.
Cut felt to fit, do this individually as each bin is slightly different:
13. Apply spray adhesive to felt, then smooth felt onto bottom.
Cut away excess from edges:
Felt is cut slightly in from side edges to be as hidden as possible.
14. For rope handles simply thread rope through holes.
To secure apply hot glue blob to rope and wrap with jute multiple times over glue, double knot with glue:
Complete.
Use your imagination to see the bins in their new home here:
Keep imagining that these big bins:
Are all nestled in their new home 'here':
A total collaboration project from a customer who simply found me while surfing the internet.
Glad I was able to make her space more useful all while creating a unique, custom product.
I'm linking up to:
Whatcha Got Weekend @ Lolly Jane
SAS @ Funky Junk
Weekend Wrap Up @ Tatertots & Jello
Sundae Scoop @ I Heart Naptime
Sister Sunday @ Sisters of the Wild West
Sunday Showcase Party @ Under the Table & Dreaming
Just Something I Whipped Up @ The Girl Creative
DIY Project Parade @ The DIY Showoff
Made by You Mondays @ Skip to My Lou
Making the World Cuter @ Making the World Cuter
Nifty Thrifty @ Coastal Charm
Tuesday Treasures @ My Uncommon Slice of Suburbia
Tutorials & Tips Tuesday @ Home Stories A to Z
Good Life @ A Beach Cottage
Delightfully Inspiring @ Delightful Order
Transformation Thursday @ The Shabby Creek Cottage
Strut Your Stuff @ Somewhat Simple
Share Awesomeness Thur @ The 36th Avenue
Flaunt it Friday @ Chic on a Shoestring
Tickled Pink @ 504 Main
Frugal Friday @ The Shabby Nest
SAS @ Just a Girl
Feathered Nest @ French Country Cottage
Remodelaholics Anonymous @ Remodelaholic
All Things Furniture @ Perfectly Imperfect
Furniture Feature Friday @ Miss Mustard Seed
POWW @ Primitive & Proper
inspiration board @ Carolyns Homework
Build(hers) Club @ Sawdust & Paperscraps
Furniture Feature Friday @ Miss Mustard Seed
POWW @ Primitive & Proper
inspiration board @ Carolyns Homework
Build(hers) Club @ Sawdust & Paperscraps


No comments:
Post a Comment